付费问答
- 付费问答
- 技术博客
- 源码买卖
原 spring boot 2.0.9集成 quartz
版权声明:本文为博主原创文章,请尊重他人的劳动成果,转载请附上原文出处链接和本声明。
本文链接:https://www.91mszl.com/zhangwuji/article/details/1058
前言:
java目前大致实现任务调度的工具有如下这些:
1 Timer 。
特点:简单易用,但由于所有任务都是由同一个线程来调度,因此所有任务都是串行执行的,同一时间只能有一个任务在执行,前一个任务的延迟或异常都将会影响到之后的任务;能实现简单的定时任务,稍微复杂点(或要求高一些)的定时任务却不好实现。
2 ScheduledExecutor
这个大家应该都用过,而且用的比Timer多;正是鉴于Timer的缺陷,Java 5推出了基于线程池设计的ScheduledExecutor;
特点:每一个被调度的任务都会由线程池中一个线程去执行,因此任务是并发执行的,相互之间不会受到干扰。需要注意的是,只有当任务的执行时间到来时,ScheduedExecutor 才会真正启动一个线程,其余时间 ScheduledExecutor 都是在轮询任务的状态。
虽然用ScheduledExecutor和Calendar能够实现复杂任务调度,但实现起来还是比较麻烦,对开发还是不够友善。
3 Spring Scheduler
spring对任务调度的实现支持,可以指定任务的执行时间,但对任务队列和线程池的管控较弱;一般集成于项目中,小任务很方便。
4 JCronTab
特点:
可指定任务的执行时间;
提供完全按照Unix的UNIX-POSIX crontab的格式来规定时间;
支持多种任务调度的持久化方法,包括普通文件、数据库以及 XML 文件进行持久化;
JCronTab内置了发邮件功能,可以将任务执行结果方便地发送给需要被通知的人;
设计和部署是高性能并可扩展。
5 quartz
quartz的相关知识点:
Scheduler:调度器,进行任务调度;quartz的大脑
Job:业务job,亦可称业务组件;定时任务的具体执行业务需要实现此接口,调度器会调用此接口的execute方法完成我们的定时业务
JobDetail:用来定义业务Job的实例,我们可以称之为quartz job,很多时候我们谈到的job指的是JobDetail
Trigger:触发器,用来定义一个指定的Job何时被执行
JobBuilder:Job构建器,用来定义或创建JobDetail的实例;JobDetail限定了只能是Job的实例
TriggerBuilder:触发器构建器,用来定义或创建触发器的实例
下面开始我们的集成工作:我们采用的是spring boot 2.0.9集成 quartz的。比spring boot 1.x的要简单很多。
pom.xml
<dependency>
	        <groupId>org.springframework.boot</groupId>
	        <artifactId>spring-boot-starter-quartz</artifactId>
	    </dependency>
application.yml
spring:
   application:
    name: microservice-job
   quartz:
    properties:
      org:
        quartz:
          scheduler:
            instanceName: clusteredScheduler
            instanceId: AUTO
          jobStore:
            class: org.quartz.impl.jdbcjobstore.JobStoreTX
            driverDelegateClass: org.quartz.impl.jdbcjobstore.StdJDBCDelegate
            tablePrefix: QRTZ_
            isClustered: true
            clusterCheckinInterval: 10000
            useProperties: false
          threadPool:
            class: org.quartz.simpl.SimpleThreadPool
            threadCount: 10
            threadPriority: 5
            threadsInheritContextClassLoaderOfInitializingThread: true
    # 数据库方式
    job-store-type: jdbc
    # 初始化表结构
    # jdbc:
    # initialize-schema: never
配置类 QuartzConfig
package com.mszl.job.config;

import org.quartz.CronScheduleBuilder;
import org.quartz.JobBuilder;
import org.quartz.JobDetail;
import org.quartz.Trigger;
import org.quartz.TriggerBuilder;
import org.springframework.context.annotation.Bean;
import org.springframework.context.annotation.Configuration;
import com.manulife.job.controller.JobController;

@Configuration
public class QuartzConfig {

	@Bean
    public JobDetail myJobDetail(){
		JobDetail jobDetail = JobBuilder.newJob(JobController.class)
                .withIdentity("cardJob","cardJobGroup")
                .usingJobData("card_job_param","job_param1")  // JobDataMap可以给任务execute传递参数
                .storeDurably()
                .build();
        return jobDetail;
    }

    @Bean
    public Trigger myTrigger(){
        Trigger trigger = TriggerBuilder.newTrigger()
                .forJob(myJobDetail())
                .withIdentity("cardTrigger","cardTriggerGroup")
                .usingJobData("card_job_trigger_param","card_job_trigger_param1")
                .startNow()
                //.withSchedule(SimpleScheduleBuilder.simpleSchedule().withIntervalInSeconds(5).repeatForever())
                .withSchedule(CronScheduleBuilder.cronSchedule("*/5 * * * * ?")) // 5s执行一次
                .build();
        return trigger;
    }


}
Controller
package com.mszl.job.controller;

import org.quartz.JobExecutionContext;
import org.quartz.JobExecutionException;
import org.springframework.beans.factory.annotation.Autowired;
import org.springframework.scheduling.quartz.QuartzJobBean;
import com.manulife.job.service.JobService;

public class JobController extends QuartzJobBean{

	@Autowired
	private JobService jobService;


	@Override
	protected void executeInternal(JobExecutionContext context) throws JobExecutionException {
		jobService.insertIdcard();
        System.out.println("hello job");
	}


}
注意:需要继承 QuartzJobBean
Service
package com.mszl.job.service.impl;
import java.text.SimpleDateFormat;
import java.util.Date;
import org.springframework.stereotype.Service;
import com.manulife.job.service.JobService;
@Service
public class JobServiceImpl implements JobService{
@Override
public void insertIdcard() {
SimpleDateFormat sf=new SimpleDateFormat("yyyy-MM-dd HH:mm:ss"); // 设置日期格式
Date dt=new Date();
String currentSystemTime=sf.format(dt);
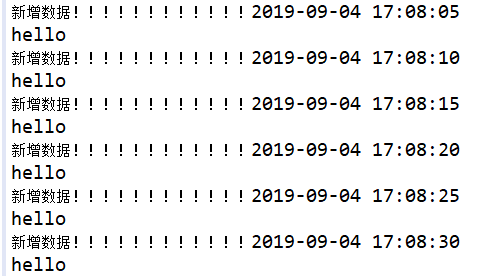
System.out.println("新增数据!!!!!!!!!!!!" + currentSystemTime);
}
}到此就集成好了quartz
我们启动项目来看看效果。
我们在编写一个工具类,来专门停止,删除,恢复任务。
QuartzUtils 工具类。
package com.mszl.job.utils;

import org.quartz.JobKey;
import org.quartz.Scheduler;
import org.quartz.SchedulerException;
import org.quartz.TriggerKey;
import org.springframework.beans.factory.annotation.Autowired;
import org.springframework.stereotype.Component;

@Component
public class QuartzUtils {

	@Autowired
    private static Scheduler scheduler;

	@Autowired
	public void setScheduler(Scheduler scheduler) {
		QuartzUtils.scheduler = scheduler;
	}

	/**
	 * 功能:停止
	 * http://www.91mszl.com
	 */
    public static String stopJob(String jobName, String jobGroup) throws SchedulerException{
    	JobKey key = new JobKey(jobName, jobGroup);
    	scheduler.pauseJob(key);
    	return "stop job success";
    }

    /**
	 * 功能:恢复
	 * http://www.91mszl.com
	 */
    public static String regainJob(String jobName, String jobGroup) throws SchedulerException {
		JobKey key = new JobKey(jobName, jobGroup);
		scheduler.resumeJob(key);
		return "regain job success";
	}

    /**
	 * 功能:删除
	 * http://www.91mszl.com
	 */
 	public static String deleteJob(String jobName, String jobGroup) throws SchedulerException{
 		TriggerKey triggerKey = TriggerKey.triggerKey(jobName, jobGroup);
        scheduler.pauseTrigger(triggerKey); // 停止触发器
        scheduler.unscheduleJob(triggerKey); // 移除触发器
     	JobKey key = new JobKey(jobName, jobGroup);
     	scheduler.deleteJob(key); // 删除任务
     	return "delete job success";
    }


}
2019-09-04 15:35:50 阅读(1321)
名师出品,必属精品 https://www.91mszl.com
Copyright © 2015 - 2025. 91名师指路. All Rights Reserved. 91名师指路 版权所有 鄂ICP备2022008697号-1
 苏公网安备32058302003540
